“This is courage in a man: to bear unflinchingly what heaven sends,” – Euripides
“And let us not be weary in well doing; for in due season we shall reap, if we faint not.” – Galations 6:9
Layout
I mapped out the memory book I’m making about my father. Using photos and text from a biography I wrote, I organized the book page by page drawn to scale (loosely) on graph paper. Some parts may be a two page spread because of the size of the photos or documents. I quickly learned that I needed to reduce the sizes of my photo prints. The page sizes in the kit book are 7.5″ x 7.5″. I needed to reduce the photos to about 2.5″ x 3″ or 4″ x 3″, 4″ x 2.5″ depending on the original photo size and dimensions. The book layout also showed me I may not use all of the 72 pages in the kit. I want to be flexible in the layout so that through out the creative process I can adjust the placement of pages and text.
Title Page
Unbinding
Last week, I started making the title page and the first couple pages. But first I decided to unbind the pages in case I wanted to include gel printing on some of them. The pages were sewn and glued at the binding. First, I removed the threads. There were about 6 sections of 6 pages each bound with the thread. Then I needed to remove the glue. The procedure took patience and care so I wouldn’t tear. I used a utility knife to delicately separate the paper from the stubborn glued areas. It was successful.
Page preparations
I numbered the pages front and back keeping them in the sections they’d originally been arranged. Next, I painted gesso on the Title Page to prepare it for the text. I had already done a sample so I used my light box to copy the text in light pencil onto the page.
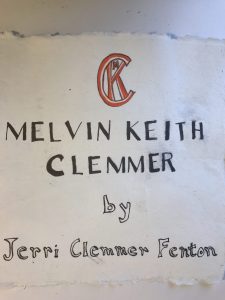
Ink smudges, oh my
Okay, so I learned impatience and trying to hurry was a hazard when using calligraphy ink that is not permanent. On the gessoed paper the ink took a long time drying. I wasn’t aware as I carefully inked in the block letters of my design on line two that my little finger had smudged the first line of text. Then trying to clean up the mess became disastrous leaving stains and runs. – Start Over – Because I had disassembled the pages, I was able to take a couple pages from the back of the book. This time, I left hours and a hair dryer to ensure there were no smudges. The messed up page became a test zone where I tried using gesso to seal. (No, it doesn’t seal) I tried spraying an area with fixative and laid in text on top. The text still lifted but was easier to clean. I found some old lacquer which fixed the text but left a yellow tint over the area. The page came out okay but here is some advice. My page came out wrinkled after I pasted some items on page 2 on the flip side. I placed a clean white sheet of paper on top and then placed heavy books on the paper to flatten out the buckles. So guess what happened? Some of the ink lifted off. Next, I applied more ink to those areas and let it air dry. To be safe I will spray with some new lacquer.
If anyone knows of a permanent ink cartridge that works with a Sheaffer calligraphy pen. I’m open for suggestions in the comments or by email.
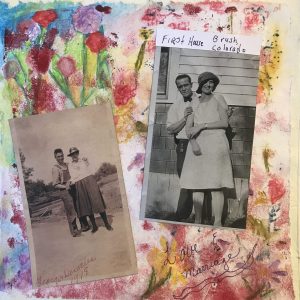
Here is a sample of one of my pages. I used a gel printed page and embellished it with Prismacolor watercolor pencil and Ranger distressed crayons using a couple of stencils from Stencil Girl Products. (Sjodin M217 was one)